Jenkins Build Configuration for Game Dev: From One Button to Multi-Platform
Your Perforce triggers fire, Jenkins starts a build... and then what? Most studios get automated triggers working and then spend months fighting with build configuration. Here's how to get it right.
- Jenkins
- CI/CD
- Build Configuration
- Unreal Engine
- Unity
- Pipeline

This is Part 3 of the “Build Your Game Dev Pipeline” series. Part 1: Task Management → Part 2: Perforce + Jenkins Triggers → Part 3: Build Configuration → Part 4: Testing & QA → Part 5: Deployment.
Your Perforce triggers fire. Jenkins starts a build. And then… it takes four hours, produces a 200 GB artifact nobody can find, and fails on PS5 because someone hardcoded a Windows path.
If Part 2 was about making builds start automatically, Part 3 is about making them actually work. This is where most studios stall. They get the trigger wired up, celebrate, and then spend months fighting with build scripts that only one person understands.
I’ve seen a studio where the “build guy” kept the entire Jenkins configuration in his head. When he went on paternity leave, nobody could ship a build for three weeks. Three weeks. Not because the code was broken, but because nobody knew which checkboxes to tick in Jenkins.
Build configuration isn’t glamorous. But it’s the difference between “we ship when we want” and “we ship when Dave gets back from vacation.”
What Makes Game Dev Builds Different
Before we get into Jenkins specifics, it’s worth understanding why game dev builds are a special kind of pain compared to web or enterprise software.
They’re enormous. A web app builds in seconds. An AAA game build can take hours. Unreal Engine cooking alone can run for 45 minutes on a fast machine. You’re compiling C++, cooking assets, compiling shaders (sometimes millions of permutations), and packaging everything into platform-specific formats.
They target multiple platforms simultaneously. Your Jenkins job isn’t producing one artifact. It’s producing builds for Win64, PS5, Xbox Series X, and maybe Switch. Each platform has its own SDK, its own quirks, and its own certification requirements.
They mix code and content. A web deploy is mostly code. A game build includes textures, meshes, audio, animations, and level data. A single texture change can invalidate a cooked asset cache and add 20 minutes to your build.
They have platform-specific toolchains. Console builds require proprietary SDKs that can’t run in the cloud. Your PS5 builds need a machine with the PlayStation SDK installed, under NDA, behind a locked door.
This means your Jenkins setup needs to be more thoughtful than a standard CI pipeline.
Build Types: Know What You’re Building
Every build you run should have a clear purpose. Random “just build it” jobs waste hours of compute time and produce artifacts nobody uses.
| Build Type | Purpose | When to Run | Typical Duration |
|---|---|---|---|
| Development | Day-to-day iteration. Debug symbols, unoptimized. | Every commit | 15-30 min |
| Test | Includes test frameworks, assertions enabled. | Nightly or pre-merge | 30-60 min |
| Shipping | Production-ready. Optimized, stripped, signed. | Release candidates | 1-4 hours |
| Debug | Maximum debug info, sanitizers enabled. | On demand (crash investigation) | 20-45 min |
Most studios only need Development and Shipping builds running automatically. Test builds can run nightly. Debug builds are on-demand when someone’s hunting a crash.
Don’t run Shipping builds on every commit. A Shipping build with full optimization can take 4x longer than Development. If you’re burning four hours of build machine time on every commit, you’ll run out of build capacity by lunch.
Jenkins Job Structure
Here’s how to organize your Jenkins jobs for a game project. Start simple and add complexity only when you need it.
The Starter Setup: One Parameterized Job
If you’re just getting started, a single parameterized Freestyle or Pipeline job works fine. Don’t over-engineer this.
pipeline {
    agent { label 'build-machine' }

    parameters {
        string(name: 'CHANGELIST', description: 'Perforce changelist number')
        choice(name: 'BUILD_TYPE', choices: ['Development', 'Shipping', 'Test', 'Debug'],
               description: 'Build configuration')
        choice(name: 'PLATFORM', choices: ['Win64', 'Linux', 'PS5', 'XboxSeriesX'],
               description: 'Target platform')
    }

    stages {
        stage('Sync') {
            steps {
                p4sync(
                    credential: 'perforce-creds',
                    populate: syncOnly(force: false, have: true, quiet: true),
                    source: depotSource('//depot/GameProject/...')
                )
            }
        }

        stage('Build') {
            steps {
                script {
                    if (params.PLATFORM == 'Win64') {
                        bat """
                            "C:\\Program Files\\Epic Games\\UE_5.4\\Engine\\Build\\BatchFiles\\RunUAT.bat" ^
                            BuildCookRun ^
                            -project="%WORKSPACE%\\GameProject.uproject" ^
                            -targetplatform=${params.PLATFORM} ^
                            -clientconfig=${params.BUILD_TYPE} ^
                            -build -cook -stage -pak -archive ^
                            -archivedirectory="%WORKSPACE%\\Builds"
                        """
                    } else {
                        sh """
                            /opt/UnrealEngine/Engine/Build/BatchFiles/RunUAT.sh \\
                            BuildCookRun \\
                            -project="\${WORKSPACE}/GameProject.uproject" \\
                            -targetplatform=${params.PLATFORM} \\
                            -clientconfig=${params.BUILD_TYPE} \\
                            -build -cook -stage -pak -archive \\
                            -archivedirectory="\${WORKSPACE}/Builds"
                        """
                    }
                }
            }
        }

        stage('Archive') {
            steps {
                archiveArtifacts artifacts: 'Builds/**', fingerprint: true
            }
        }
    }

    post {
        failure {
            slackSend channel: '#builds', message: "Build FAILED: CL ${params.CHANGELIST}"
        }
        success {
            slackSend channel: '#builds', message: "Build SUCCESS: CL ${params.CHANGELIST} (${params.PLATFORM} ${params.BUILD_TYPE})"
        }
    }
}
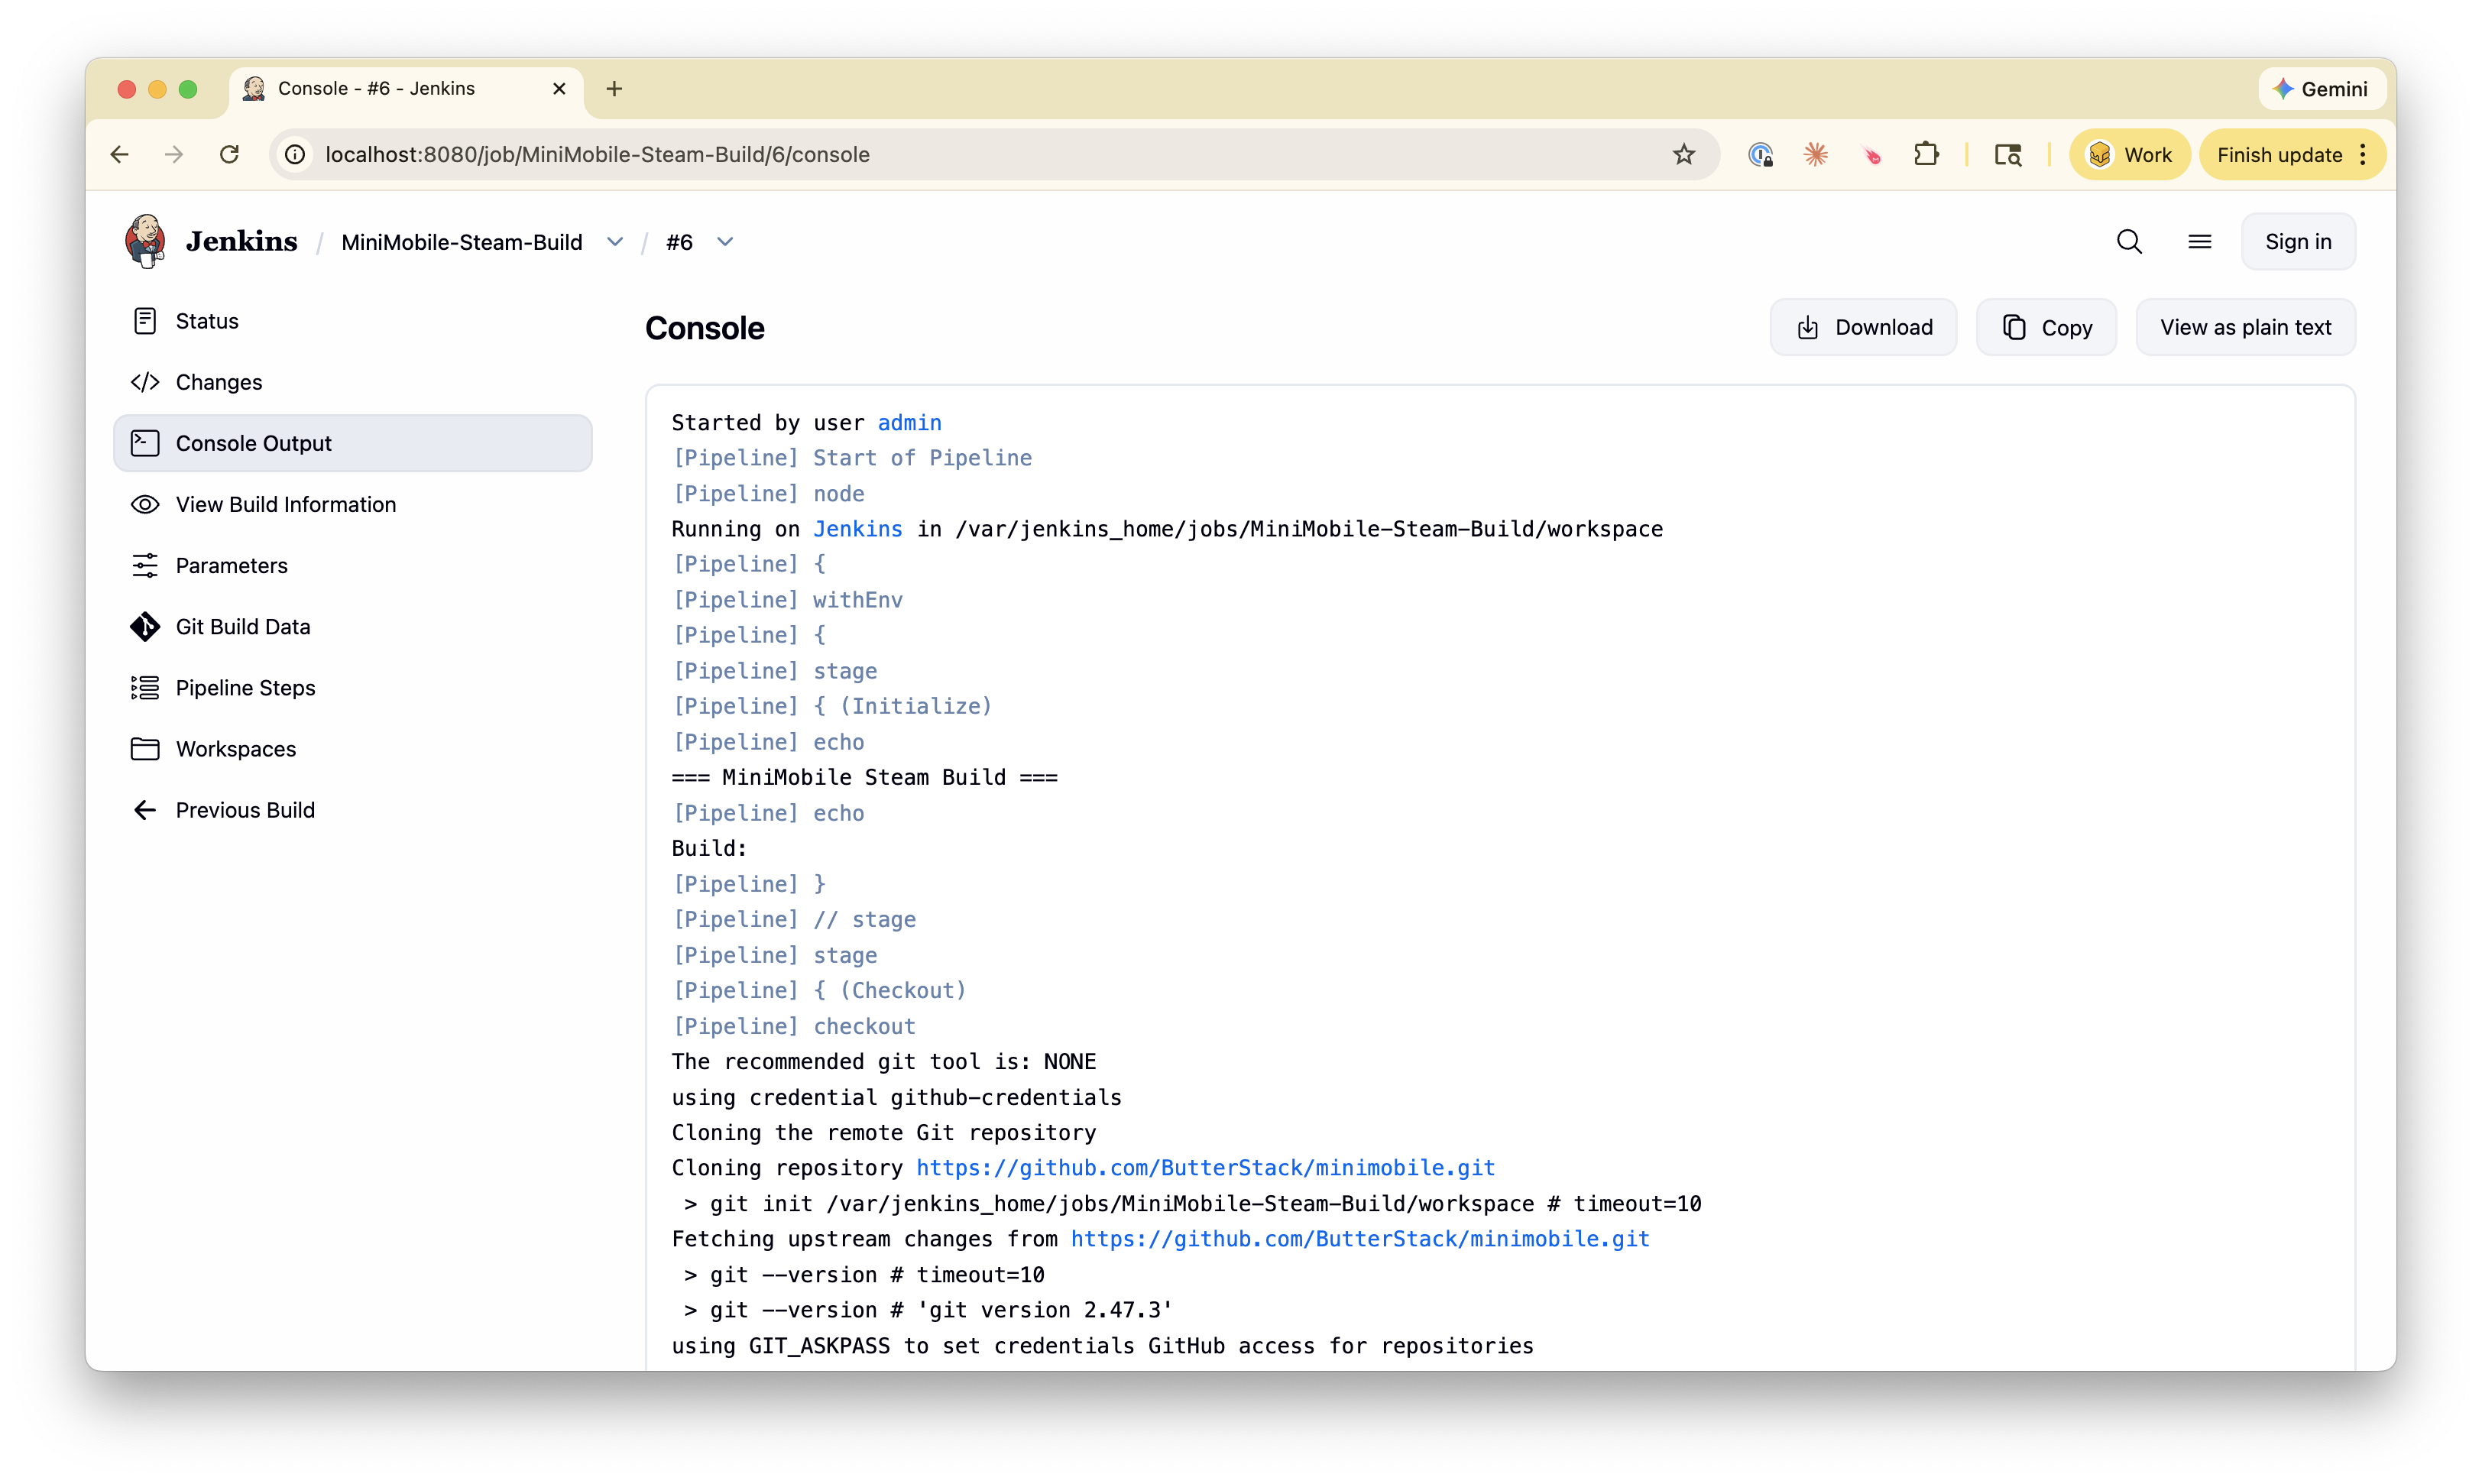
This gives you a working build with three parameters. Your Perforce trigger from Part 2 passes the changelist number, and you can manually choose build type and platform.
Growing Up: Multi-Platform Matrix Builds
Once you need to build for multiple platforms, Jenkins parallel stages save you from maintaining separate jobs:
// Define a shared function for building on any platform
def buildGame(String changelist, String buildType, String platform) {
    p4sync(
        credential: 'perforce-creds',
        populate: syncOnly(force: false, have: true, quiet: true),
        source: depotSource('//depot/GameProject/...')
    )
    sh """
        /opt/UnrealEngine/Engine/Build/BatchFiles/RunUAT.sh BuildCookRun \\
        -project="\${WORKSPACE}/GameProject.uproject" \\
        -targetplatform=${platform} \\
        -clientconfig=${buildType} \\
        -build -cook -stage -pak -archive \\
        -archivedirectory="\${WORKSPACE}/Builds/${platform}"
    """
    archiveArtifacts artifacts: "Builds/${platform}/**", fingerprint: true
}

pipeline {
    agent none

    parameters {
        string(name: 'CHANGELIST', description: 'Perforce changelist number')
        choice(name: 'BUILD_TYPE', choices: ['Development', 'Shipping'],
               description: 'Build configuration')
    }

    stages {
        stage('Build All Platforms') {
            parallel {
                stage('Win64') {
                    agent { label 'windows-build' }
                    steps {
                        buildGame(params.CHANGELIST, params.BUILD_TYPE, 'Win64')
                    }
                }
                stage('Linux') {
                    agent { label 'linux-build' }
                    steps {
                        buildGame(params.CHANGELIST, params.BUILD_TYPE, 'Linux')
                    }
                }
                stage('PS5') {
                    agent { label 'ps5-build' }
                    steps {
                        buildGame(params.CHANGELIST, params.BUILD_TYPE, 'PS5')
                    }
                }
            }
        }
    }
}
Each platform runs on a dedicated build agent with the right SDK installed. Win64 and Linux can potentially share a machine; console builds need their own hardware with proprietary SDKs.
Unreal Engine Specifics
If you’re building an Unreal Engine project, here’s what you actually need to know (not the sanitized version from the docs).
RunUAT Is Your Best Friend and Worst Enemy
RunUAT.bat (or .sh) is the Unreal Automation Tool. It handles building, cooking, packaging, and archiving. It’s powerful and its error messages are terrible.
Key flags you’ll actually use:
RunUAT.sh BuildCookRun \
    -project="/path/to/Game.uproject" \
    -targetplatform=Win64 \
    -clientconfig=Development \
    -build \
    -cook \
    -stage \
    -pak \
    -archive \
    -archivedirectory="/builds" \
    -compressed \
    -prereqs \
    -nodebuginfo
Here’s what each flag does:
| Flag | Purpose |
|---|---|
-build |
Compile C++ code |
-cook |
Convert assets to platform-optimized format |
-stage |
Stage files for packaging |
-pak |
Package into .pak files |
-archive |
Copy final build to archive directory |
-compressed |
Compress pak files |
-prereqs |
Include prerequisites installer |
-nodebuginfo |
Skip debug symbols (use for Shipping) |
The cooking trap: Cooking is where Unreal converts editor-format assets into platform-optimized formats. It’s the slowest part of most builds. A full cook can take 30-60 minutes. An incremental cook (only changed assets) takes 5-10 minutes. Always use incremental cooks for Development builds. Full cooks for Shipping only.
To get incremental cooking working on Jenkins:
- Keep a persistent workspace (don’t wipe between builds)
- Use the same build agent for the same project
- Don’t clean the
Saved/Cookeddirectory unless you have to
Derived Data Cache (DDC)
Unreal’s DDC stores compiled shaders and cooked assets. A shared DDC across your build machines can cut build times dramatically.
The recommended way to configure a shared DDC is in your project’s DefaultEngine.ini. Override the Shared node to point at your network path:
[DerivedDataBackendGraph]
Shared=(Type=FileSystem, ReadOnly=false, Clean=false, Flush=false, DeleteUnused=true, UnusedFileAge=10, FoldersToClean=10, MaxFileChecksPerSec=1, ConsiderSlowAt=70, PromptIfMissing=false, Path=\\buildserver\DDCCache, EnvPathOverride=UE-SharedDataCachePath, EditorOverrideSetting=SharedDerivedDataCache)
Important gotcha: If you’re using an installed build of the engine (i.e., from the Epic Games Launcher rather than compiled from source), you need to use [InstalledDerivedDataBackendGraph] instead. Installed builds ignore [DerivedDataBackendGraph] entirely, and the installed graph doesn’t include a Shared node by default — you’ll need to add one.
You can also configure the shared path per-machine using the UE-SharedDataCachePath environment variable (on macOS/Linux, use underscores: UE_SharedDataCachePath). This is often easier than editing INI files when you have multiple build agents with different network topologies. For a quick command-line override, -SharedDataCachePath=\\buildserver\DDCCache works too.
A shared DDC means if one machine already compiled a shader permutation, other machines skip it. For studios with multiple build agents, this alone can save hours per day.
DDC configuration options vary between engine versions. Check Epic’s DDC documentation for the syntax that matches your UE version.
Engine Version Pinning
Pin your engine version explicitly. Don’t use “latest” or let it auto-update:
# In your .uproject file
"EngineAssociation": "5.4"
And in your Jenkins job, point to a specific engine installation:
UE_ROOT="/opt/UnrealEngine/5.4.2"
"${UE_ROOT}/Engine/Build/BatchFiles/RunUAT.sh" BuildCookRun ...
Nothing ruins a Friday like a build that silently picked up a new engine patch and broke shader compilation.
Unity Specifics
Unity builds are simpler than Unreal in some ways, but have their own gotchas.
Unity Batch Mode
Unity’s command-line interface uses -batchmode for headless builds:
Unity \
    -batchmode \
    -nographics \
    -projectPath "/path/to/project" \
    -executeMethod BuildScript.PerformBuild \
    -buildTarget Win64 \
    -logFile "/builds/logs/build.log" \
    -quit
The -executeMethod flag calls a static C# method in your project. This is where your build logic lives:
// Assets/Editor/BuildScript.cs
public class BuildScript
{
    public static void PerformBuild()
    {
        var options = new BuildPlayerOptions
        {
            scenes = EditorBuildSettings.scenes
                .Where(s => s.enabled)
                .Select(s => s.path)
                .ToArray(),
            locationPathName = "Builds/Win64/Game.exe",
            target = BuildTarget.StandaloneWindows64,
            options = BuildOptions.None
        };

        var report = BuildPipeline.BuildPlayer(options);

        if (report.summary.result != BuildResult.Succeeded)
        {
            EditorApplication.Exit(1);
        }
    }
}
Unity License Activation for CI
Unity requires a license activation on each build machine, and the process depends on which license model your organization uses.
Build Server licenses (recommended for CI at scale): Unity offers dedicated Build Server licenses designed for headless CI machines. They’re floating licenses that don’t consume developer seats — a build agent checks one out when a build starts and returns it when done. Build Server licensing is included with Enterprise/Industry plans and available as a paid add-on for Pro. If you’re running more than one or two build agents, this is the right approach.
Named-user licensing (most orgs in 2025+):
Unity has moved Pro, Enterprise, and Industry plans to named-user licensing (NUL). For CI with a NUL account, you can activate via CLI using entitlement-only mode — pass -serial without a serial key value:
# Entitlement-only activation (NUL accounts, no serial key needed)
Unity -batchmode -nographics \
    -serial \
    -username "${UNITY_USERNAME}" \
    -password "${UNITY_PASSWORD}" \
    -quit
Don’t pass both a serial key and username/password together — this triggers duplicate activations (one serial-based, one entitlement-based) on the same machine.
Serial-based activation (legacy):
If your organization still has serial-based licenses, the older CLI activation with -serial YOUR-SERIAL-KEY still works. Be aware that serial-based activations can break when hardware changes (new NIC, VM migration).
Either way, store credentials in Jenkins Credentials, not in your build scripts.
Build Numbering That Doesn’t Drive You Insane
“Which build has my fix?” is the question that launches a thousand Slack threads. A good build numbering scheme prevents this.
The Simple Approach
<major>.<minor>.<changelist>
Example: 1.2.45678 tells you it’s version 1.2, built from Perforce changelist 45678. Anyone can look up CL 45678 to see exactly what’s in the build.
The Jenkins Approach
Use Jenkins’ built-in BUILD_NUMBER combined with your changelist:
environment {
    BUILD_VERSION = "${params.CHANGELIST}-${BUILD_NUMBER}"
}
This gives you 45678-142, meaning changelist 45678, Jenkins build #142. Unique, traceable, and sortable.
Stamp It Into the Build
Whatever scheme you choose, stamp it into the actual game binary so QA can verify which build they’re testing:
// Unreal: Access via FApp::GetBuildVersion()
// Set in Build.version or via command line:
-buildversion="${BUILD_VERSION}"
// Unity: Set in PlayerSettings
PlayerSettings.bundleVersion = Environment.GetEnvironmentVariable("BUILD_VERSION");
If QA reports a bug against “the build from yesterday,” you’ve already lost. Make the version number visible in the game’s main menu or settings screen.
Artifact Management
Game builds are big. A packaged Unreal game can be 50-100 GB. You need a strategy for storing these, or your build server’s disk fills up by Thursday.
What to Keep
| Build Type | Retention | Why |
|---|---|---|
| Development | Last 5 builds | Only for immediate testing |
| Test | Last 10 builds | Regression comparison |
| Shipping | All builds | You’ll need these for cert and patches |
| Debug | Last 3 builds | On-demand, rarely needed |
Where to Store Artifacts
Jenkins’ built-in artifact storage works for small projects. For anything serious:
- Network share (simple, fast, limited scalability)
- S3/GCS bucket (scalable, cheap, slower access)
- Artifactory/Nexus (proper artifact management, metadata, cleanup policies)
stage('Archive') {
    steps {
        // Local archive
        archiveArtifacts artifacts: 'Builds/**', fingerprint: true

        // Also push to S3 for long-term storage
        s3Upload(
            bucket: 'studio-builds',
            path: "builds/${params.BUILD_TYPE}/${BUILD_VERSION}/",
            includePathPattern: 'Builds/**'
        )
    }
}
Cleanup Policy
Set up a Jenkins job or cron that prunes old Development builds. Otherwise you’ll wake up to a “disk full” alert at 3 AM:
// In your pipeline
options {
    buildDiscarder(logRotator(numToKeepStr: '10', artifactNumToKeepStr: '5'))
}
Environment Variables and Secrets
Every build configuration has secrets: API keys, signing certificates, platform SDK credentials. Handle them properly from day one.
Use Jenkins Credentials for:
- Perforce passwords
- Platform SDK tokens
- Code signing certificates
- Notification webhook URLs
- Steam upload credentials
Never:
- Hardcode secrets in Jenkinsfiles
- Store secrets in Perforce
- Print secrets in build logs (use
credentials()binding, which masks them)
environment {
    P4_CREDENTIALS = credentials('perforce-service-account')
    STEAM_CREDS = credentials('steam-upload')
}
Jenkins will automatically mask these values in console output.
Common Build Configuration Mistakes
“Works on my machine” Jenkinsfile. The developer writes the pipeline on their local Jenkins, it works, and then it breaks on the shared server because paths are different. Always use environment variables for paths, never hardcode C:\Users\Dave\UnrealEngine.
No timeout. A build that hangs forever blocks the build agent for every other job. Always set a timeout:
options {
    timeout(time: 2, unit: 'HOURS')
}
Building everything on every commit. Not every change needs a full build. Documentation changes, config tweaks, and art-only changes can skip compilation. Use your trigger script from Part 2 to filter by file type.
No notifications. A build that fails silently is worse than no automation at all. At minimum, notify on failure. Bonus points for notifying the person whose changelist triggered the build:
post {
    failure {
        slackSend channel: '#builds',
            message: "@${env.P4_USER} Build failed for CL ${params.CHANGELIST}"
    }
}
Single build agent. One build machine means one build at a time. When your team grows past 5-10 developers, you need at least two agents. Jenkins’ agent labeling system makes this straightforward: label machines by platform and capability, and let Jenkins route jobs automatically.
How ButterStack Helps
Jenkins tells you a build passed or failed. ButterStack tells you why it matters.
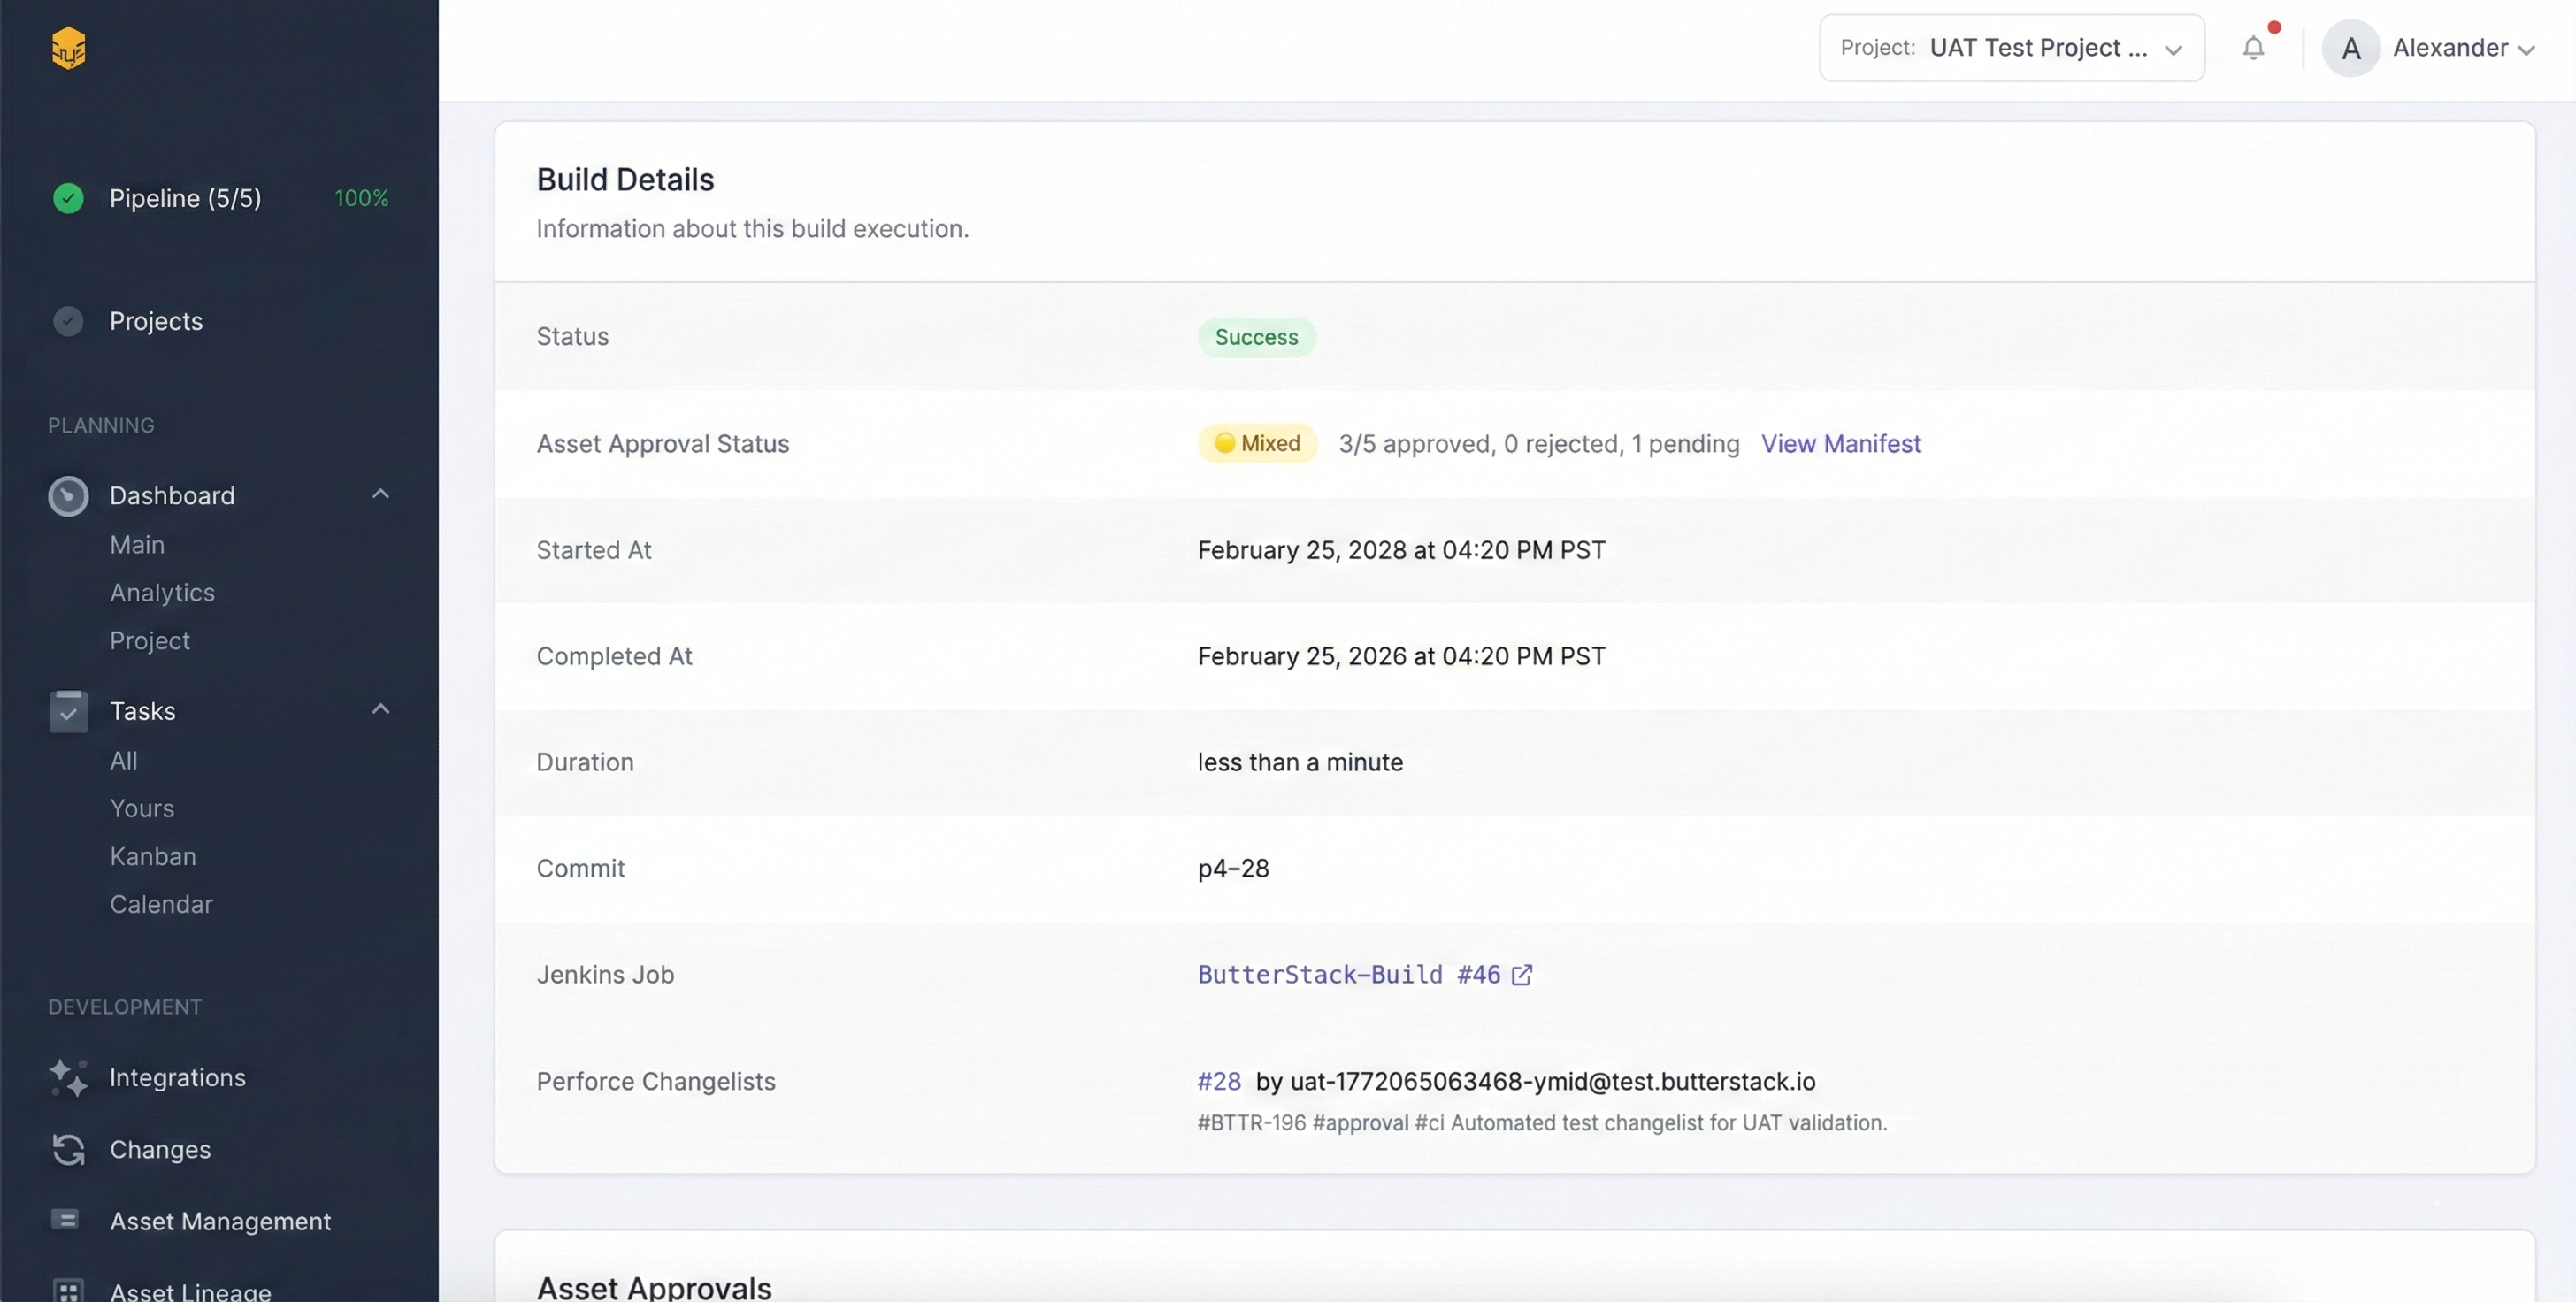
When you connect your Jenkins instance to ButterStack, every build run is tracked with its full context: which changelist triggered it, which task that changelist was for, what assets were included, and who’s responsible. When a build fails, ButterStack’s failure analysis identifies the category (compile error, shader failure, asset cook issue) and attributes it to the right person.
You configure your build type (Unreal, Unity, or custom), target platforms, and source paths in ButterStack, and it generates the Jenkins pipeline for you. No more copying Jenkinsfiles between projects and hand-editing paths.
The three-step build pipeline (build, asset validation, approval) means your builds don’t just compile; they verify that asset changes are tracked and approved before anything ships. It’s the difference between “the build passed” and “the build passed and we know exactly what’s in it.”
FAQ
How many build agents do I need?
Start with one per platform you’re actively building for. A 15-person team typically needs 2-3 agents: one for Win64 Development builds (high frequency), one for console builds, and one spare for Shipping builds so they don’t block Development. Scale from there based on queue times; if developers are waiting more than 10 minutes for a build to start, you need another agent.
Should I use Jenkins Pipeline or Freestyle jobs?
Pipeline (Jenkinsfile) is the better default. Freestyle jobs are harder to version-control and review — you can manage them via Job DSL or Configuration as Code, but it’s extra machinery. A Jenkinsfile in your depot means your build configuration is tracked, reviewed, and reproducible alongside your game code. The exception is if your team is completely unfamiliar with Groovy; in that case, start with Freestyle and migrate to Pipeline once builds are stable.
How do I handle console SDK builds?
Console SDKs (PlayStation, Xbox, Nintendo) require specific hardware, NDA-bound software, and can’t run in the cloud. Dedicate physical machines with the SDKs installed, label them in Jenkins (ps5-build, xbox-build), and restrict access. These machines should be on a UPS and monitored, because a console build that fails at hour 3 of 4 because the power flickered is a special kind of pain.
What about cloud build agents?
Cloud agents (AWS, GCP) work well for Win64 and Linux builds. They don’t work for console builds (SDK licensing) and can be expensive for Unreal builds due to the compute and storage requirements. A hybrid approach works: cloud for high-frequency Development builds, on-prem for console and Shipping builds.
How do I speed up Unreal Engine builds?
In rough order of impact:
- Shared DDC across build agents (biggest single win)
- Incremental cooking (don’t wipe the workspace)
- NVMe storage on build machines (I/O is often the bottleneck)
- More CPU cores (Unreal’s UnrealBuildTool parallelizes well)
- Exclude unnecessary platforms from cooking (don’t cook Android if you’re not shipping mobile)
- IncrediBuild or FASTBuild for distributed compilation (expensive but effective for large projects)
My builds are flaky. They pass sometimes and fail other times.
Flaky builds are almost always caused by: race conditions in parallel compilation, disk space running low mid-build, network drives dropping during asset cooking, or shared DDC corruption. Start by checking disk space and network stability. Then isolate: does the build fail on the same machine consistently? Same platform? Same time of day? Patterns reveal causes.
What’s Next
Your builds are now automated, configured for multiple platforms, and producing properly numbered artifacts. But a build that compiles isn’t the same as a build that works. In Part 4, we’ll cover testing and QA gates: how to add automated tests, performance checks, and approval workflows so that “build passed” actually means something.
Conclusion
Build configuration is the unsexy middle of your pipeline, but it’s where most studios either get efficient or stay stuck. The key principles:
- Name your build types and know when to use each one. Don’t run Shipping builds on every commit.
- Parameterize everything. Build type, platform, and changelist should be inputs, not hardcoded values.
- Pin your engine versions. Surprise engine updates during a milestone are avoidable disasters.
- Manage your artifacts. Set retention policies before your disk fills up.
- Secure your secrets. Jenkins Credentials exist for a reason.
Combined with the task management from Part 1 and the automated triggers from Part 2, you now have a pipeline where every task generates traceable commits, every commit triggers a build, and every build is configured to produce the right artifact for the right platform. When QA asks “which build has my fix?” you can answer in seconds, not hours.
Thanks!
Ryan L’Italien
Founder and CEO of ButterStack

Want to see what pipeline observability looks like? Try ButterStack free and connect your first integration in minutes.
Or just email me at: ryan@butterstack.com.


